
B5/B6 clutch (no flywheel)


 05-15-2006, 11:41 PM
#152
Audi Forum - Posts like an A1

Join Date: Apr 2006
Location: Montr�al
Posts: 17

Painted flat black by "Flying Colors" with an orangy-yellow viser.
Helmet is a Stand 21, Carbon Fibre unit and weighs in at only 1200 grams!
The various decals are not for extra HP but rather to thank friends that help me out set up the car.
Front view.

Side view.

Rear view.

Helmet is a Stand 21, Carbon Fibre unit and weighs in at only 1200 grams!
The various decals are not for extra HP but rather to thank friends that help me out set up the car.
Front view.
Side view.
Rear view.
 05-16-2006, 10:23 AM
#154
Audi Forum - Posts like an A4
Join Date: May 2006
Location: MTL
Posts: 174
To those who are skeptic about the product. They were feature at the 2002 and 2003 Sema show.
http://www.off-road.com/toc/events/2002sema/
http://www.4x44u.com/SEMA2003/NewProducts/index2.html
http://www.off-road.com/toc/events/2002sema/
http://www.4x44u.com/SEMA2003/NewProducts/index2.html

 05-19-2006, 07:35 AM
#157
Audi Forum - Posts like an A1
Join Date: Apr 2006
Location: Montr�al
Posts: 17
From HORCHAUS in Montreal, Canada's exclusive MTM distributor. It's going to be tailored to run on 109 Octane race gas after I manually input software changes with a Vag Com. Can't wait to see this.
Oh and they agreed to "enable left foot braking" for me. I don't know if I will be able to master that and how and where I can use it but I will try it.
Darn, maybe I'll become as good as Walter at it. LOL
Now if only my custom made stainless steel exhaust manifold can be built any time soon, I could install it and my new turbo.
05-19-2006, 09:21 AM
#158
Audi Forum - Posts like an A1

Join Date: Apr 2006
Location: Toronto
Posts: 24
So I had to do a bit of reading before I figured out what "left foot braking" was. But now I fail to see the use of it in a car with Quattro. Could someone explain where this technique would be useful? ( keep in mind that I'm not a racer / performance driver ..  )
)
05-19-2006, 05:06 PM
#159
Audi Forum - Posts like an A4
Join Date: May 2006
Location: MTL
Posts: 174
We were inform that there are rumours going around stating that the HID kits that we have are replicas of the McCulloch. Rest a sure that these are the real McCulloch HID kits. We purchase these kits directly from their Hong Kong plant. I challenge anyone to prove us wrong.
05-19-2006, 10:36 PM
#160
Audi Forum - Posts like an A1
Join Date: Apr 2006
Location: Montr�al
Posts: 17
I know it as been asked before. How to remove the back seat? Well here it is with pictures�
I decided that when I track the car, I would remove the complete rear seat assembly to cut down on the weight (and possibly the front right seat too). I weighed the rear seat assembly and if my digital scale is accurate, it�s 75 lbs on the nose +/- 1 lb.
For the purpose of the pictorial and ease of taking pictures, I removed the rear right side. The right and left side removal procedure is the same except that on the right side there is an airbag connection to the seat and that as to be disconnected prior to removing the seat, it is very easy to do, plug and play connector. Also the right side is the longer of the two halves and incorporates the middle seating position which as its own shoulder belt. The belt will have to be unbolted for the car�s chassis. I would say it takes about 15 minutes to do the removal once you know how to do it. There are really three things to do, disconnect the airbag, unscrew a Torx and unbolt the shoulder harness. Here we go�
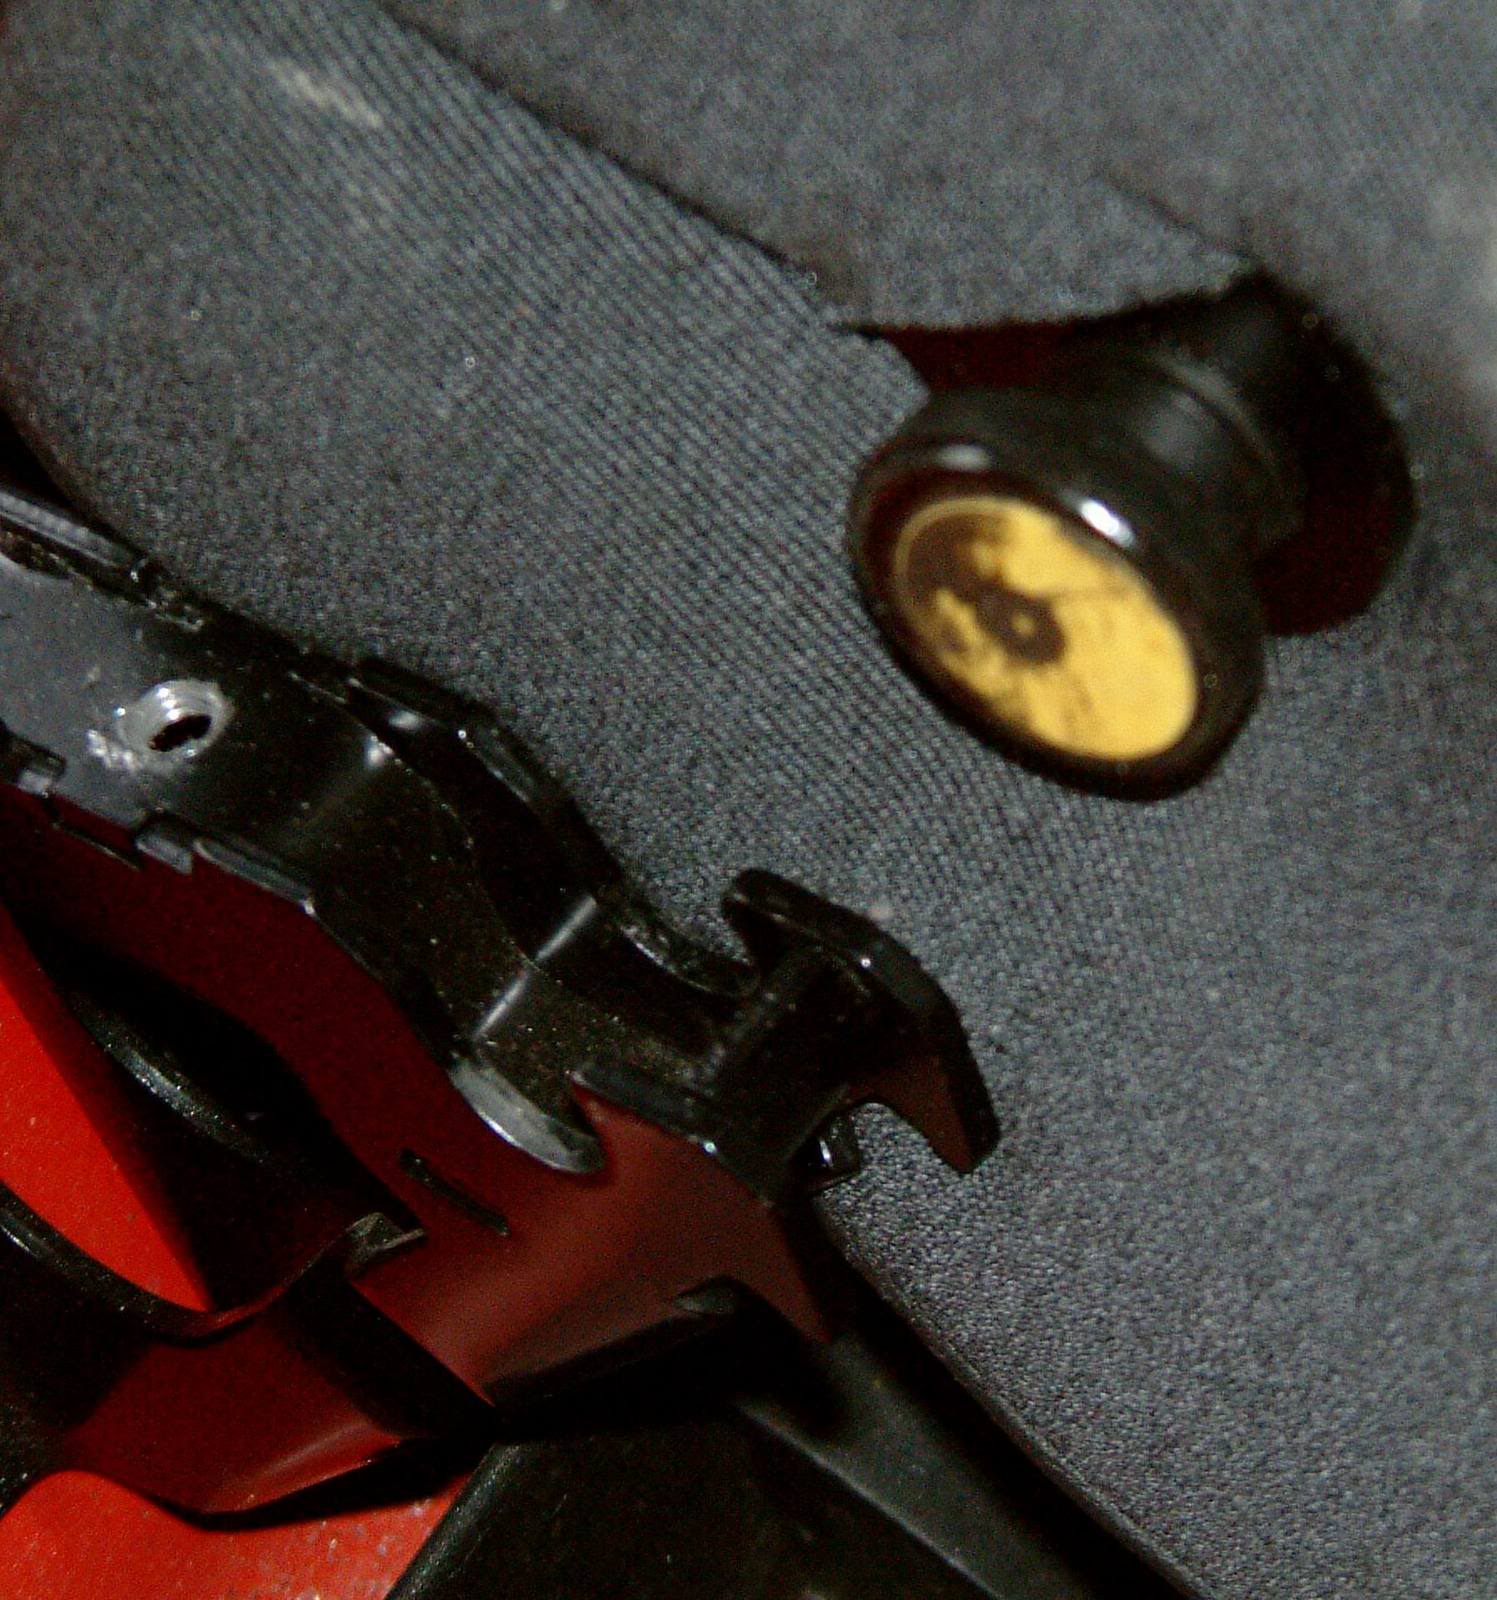
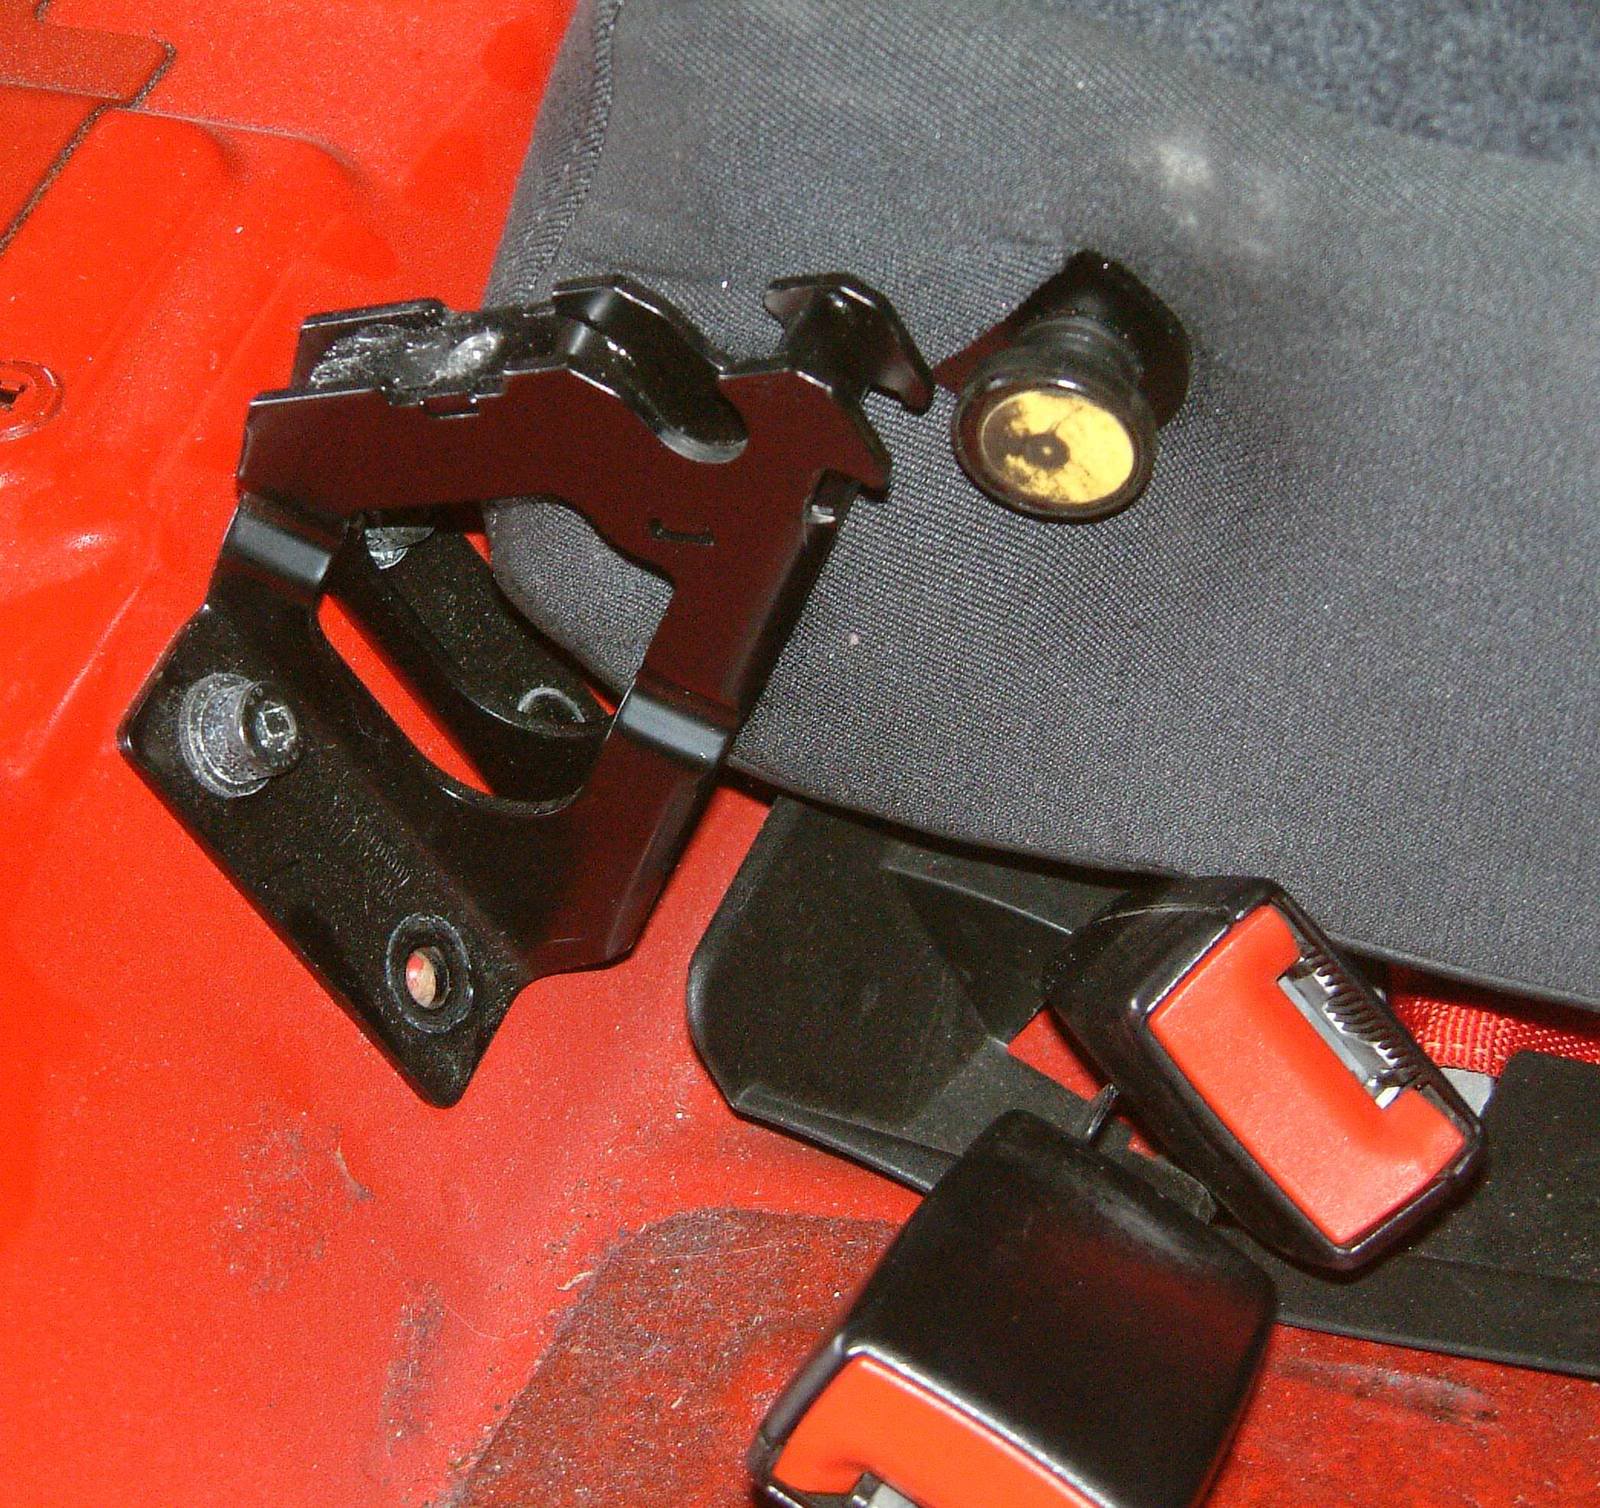
Ironically I will start by the right side to get the airbag connection out of the way. Here you can see the typical yellow airbag connector. This half is the one that is connected to the car and is simply unplugged from the one located in the seat. Once the two are connected together, the grey Styrofoam piece goes over the connector to protect the connection. The wire was also tyraped to the steel wired loop on the right and the connector was tucked under the black leather side bolster.

Now let�s go back to what would be the real first step in the removal procedure. You need to locate this plastic cap that sits on top of a metal bracket located between the two rear seats. Remove the plastic cap.
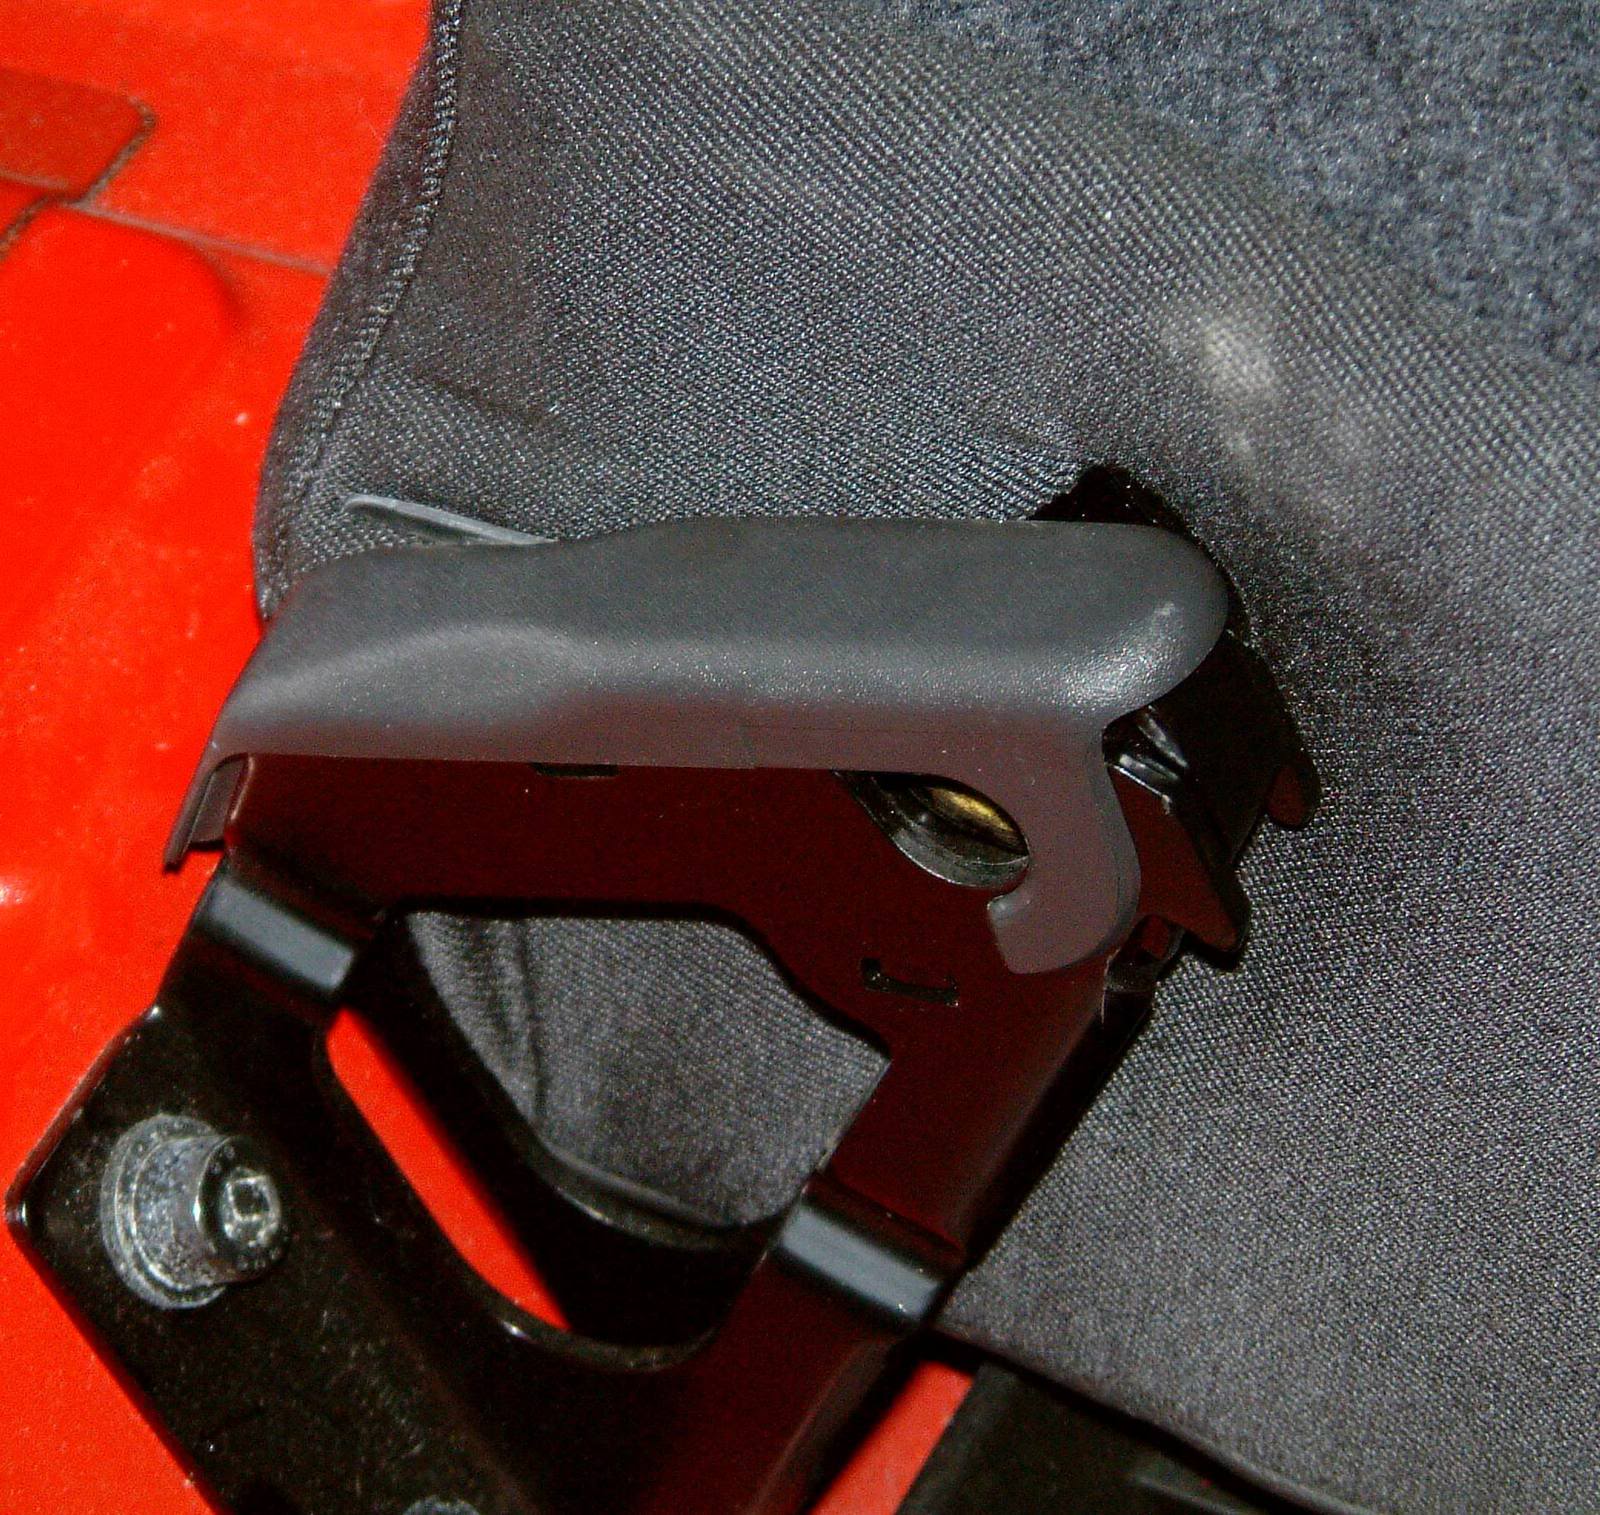
Once the plastic cap is removed, you will see a metal locking part that is held in by a Torx. Remove the Torx.
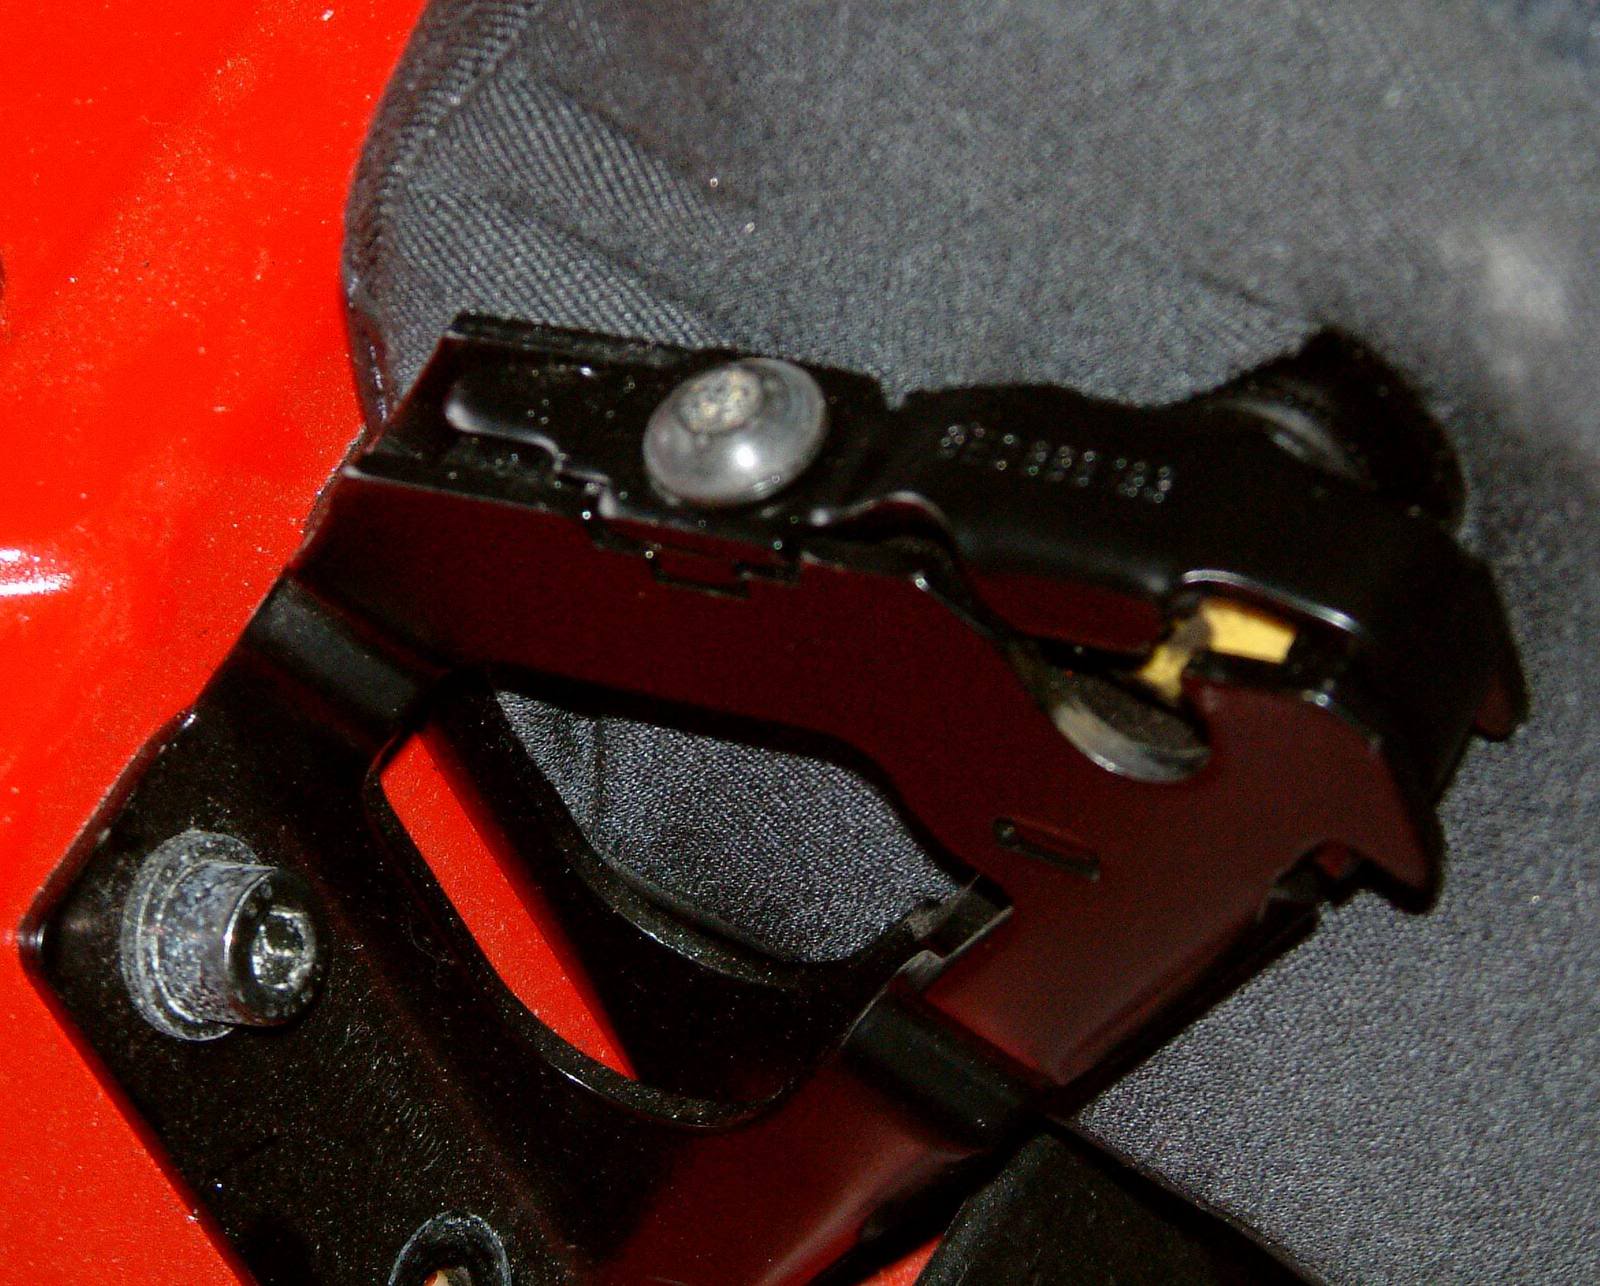
Once the Torx is removed, pry loose the metal retaining part and pull it off.

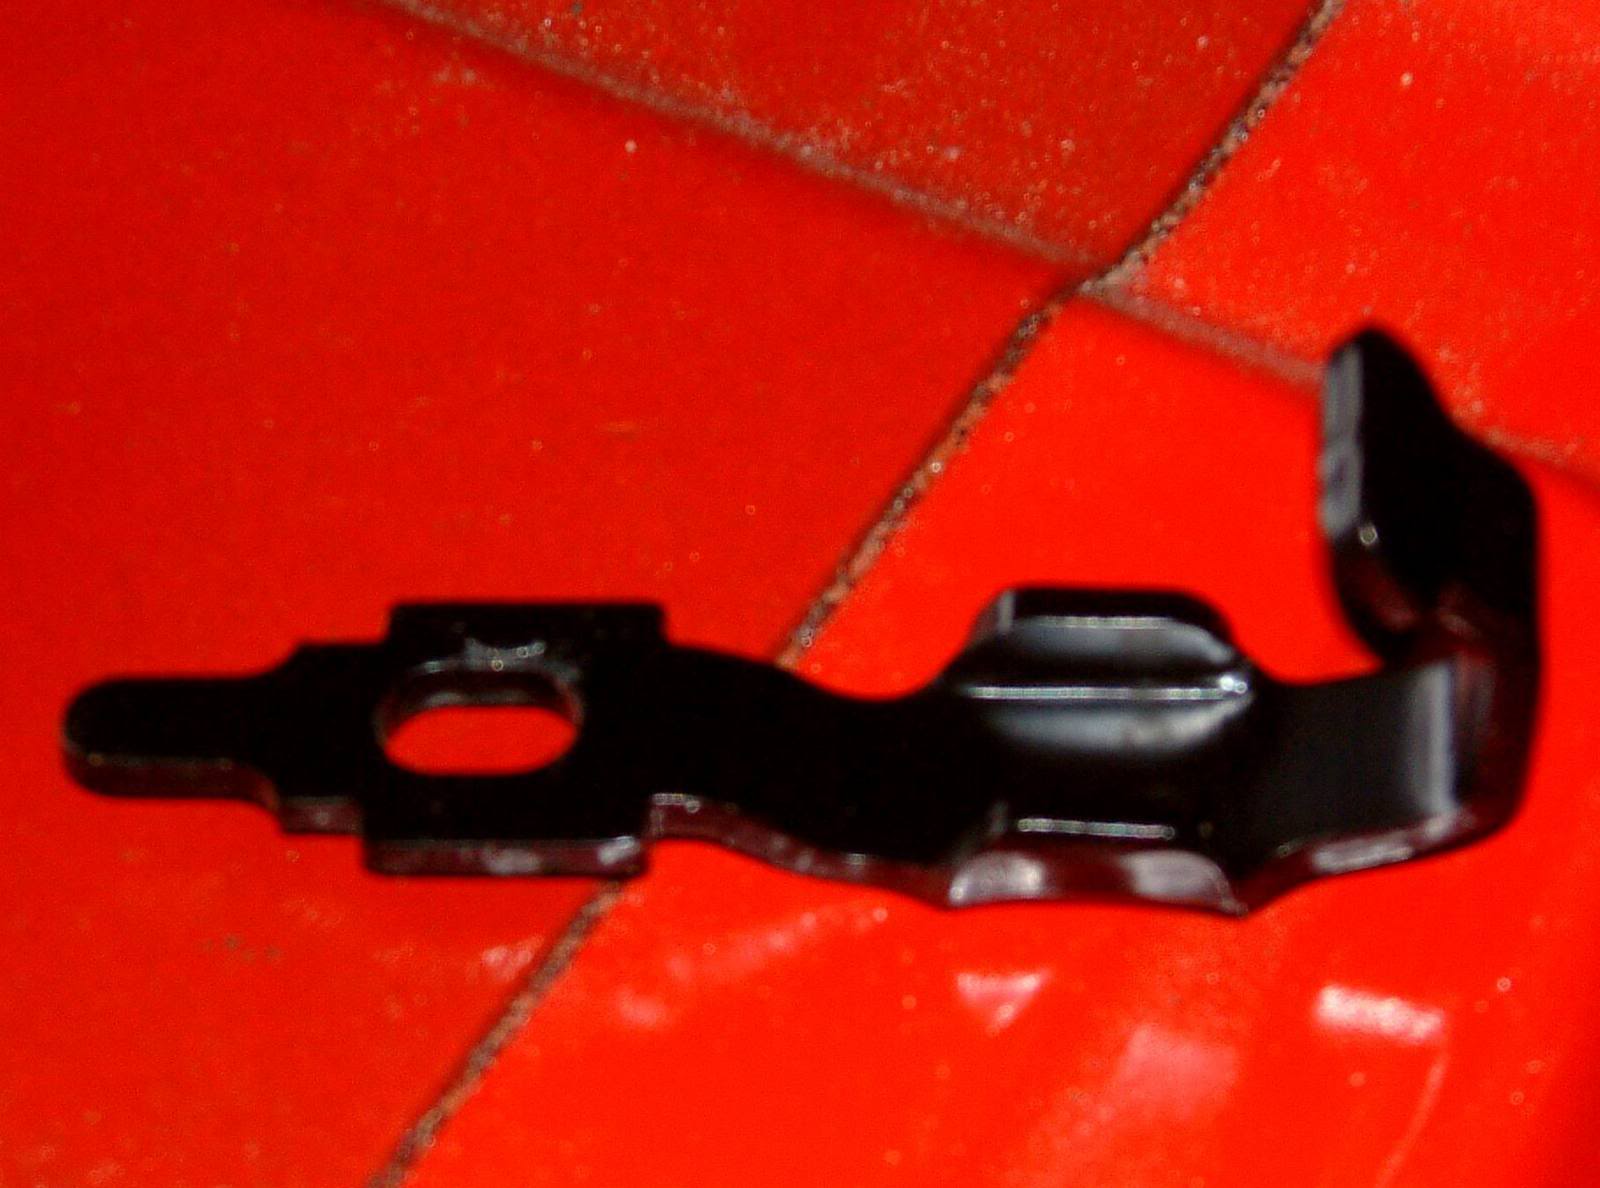
This is what that metal locking/retaining clip looks like.
Pull the seat upward and it will pop out of the retaining bracket. Once that�s done, you can pull the seat either left or right depending on which set you are removing and it will slide out of its secured position.
Another view of the seat pulled out of its secured position.
Once the seat cushions are removed, you are left with additional hardware on both sides... This can be left on or removed, I removed it.

Close up on the additional hardware.

Once the seats and the additional hardware are removed, this is what left over.

I decided that when I track the car, I would remove the complete rear seat assembly to cut down on the weight (and possibly the front right seat too). I weighed the rear seat assembly and if my digital scale is accurate, it�s 75 lbs on the nose +/- 1 lb.
For the purpose of the pictorial and ease of taking pictures, I removed the rear right side. The right and left side removal procedure is the same except that on the right side there is an airbag connection to the seat and that as to be disconnected prior to removing the seat, it is very easy to do, plug and play connector. Also the right side is the longer of the two halves and incorporates the middle seating position which as its own shoulder belt. The belt will have to be unbolted for the car�s chassis. I would say it takes about 15 minutes to do the removal once you know how to do it. There are really three things to do, disconnect the airbag, unscrew a Torx and unbolt the shoulder harness. Here we go�
Ironically I will start by the right side to get the airbag connection out of the way. Here you can see the typical yellow airbag connector. This half is the one that is connected to the car and is simply unplugged from the one located in the seat. Once the two are connected together, the grey Styrofoam piece goes over the connector to protect the connection. The wire was also tyraped to the steel wired loop on the right and the connector was tucked under the black leather side bolster.
Now let�s go back to what would be the real first step in the removal procedure. You need to locate this plastic cap that sits on top of a metal bracket located between the two rear seats. Remove the plastic cap.
Once the plastic cap is removed, you will see a metal locking part that is held in by a Torx. Remove the Torx.
Once the Torx is removed, pry loose the metal retaining part and pull it off.
This is what that metal locking/retaining clip looks like.
Pull the seat upward and it will pop out of the retaining bracket. Once that�s done, you can pull the seat either left or right depending on which set you are removing and it will slide out of its secured position.
Another view of the seat pulled out of its secured position.
Once the seat cushions are removed, you are left with additional hardware on both sides... This can be left on or removed, I removed it.
Close up on the additional hardware.
Once the seats and the additional hardware are removed, this is what left over.


